Replacing a cassette is pretty straightforward as long as you have the right tools.
Keeep in mind that the chain, crank rings and cassette all wear out over time. Typically the chain wears the fastest (it stretches) and the crank rings are next, so if you are replacing the cassette make sure you are checking the other two for wear. If you are replacing the cassette because you find your chain slipping, just know that the cassette is typically not the problem.
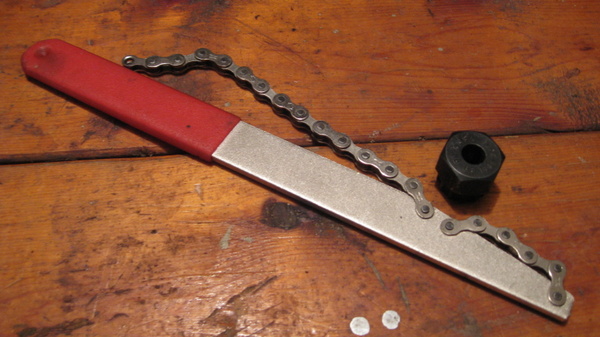
To do the job you need two things: a cassette unlocking tool and a chain whip. The cassette unlocking tool should correspond to the brand of cassette that you have, however most use a Shimano pattern (the one I am using is a SRAM, but it still uses the Shimano pattern.)
The first thing that you need to do is take the skewer out of the hub. They just screw out, be careful not to lose the springs (and take a look at how they are installed before you take them off so that you can put them on the right way.
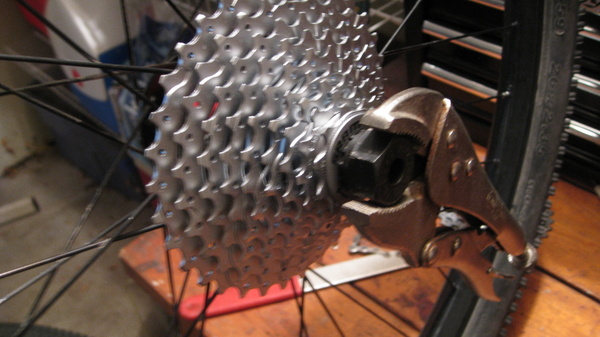
With the hub off, put the while down on a flat surface and wrap the chain whip around the cassette. Make sure that the loose portion of the chain wraps around The cassette and that the additional portion (bolted twice) is able to mesh in with the cassette for maximum grip.
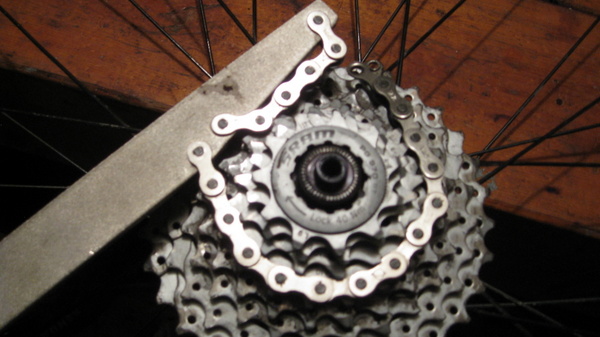
Note that the arrow on the cassette points in the direction that you turn to tighten, so you are going to want to go in the opposite direction.
Next take a pair of vise grips or other wrench where you can get good leverage (no slip joint) and put the lockring tool in the jaws, then insert it into the top of the cassette.
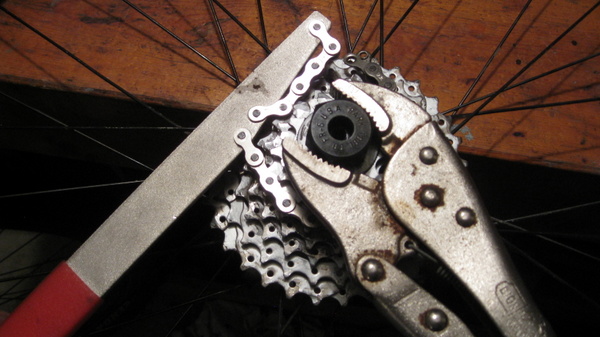
Now turn the pliers in the direction opposite the arrow to loosen up the lockring. Note that if you have not removed your cassette for a long time, this may be difficult. Be sure that the lockring tool is all the way in, if it pops out under pressure you could damage it, ruining the wheel.
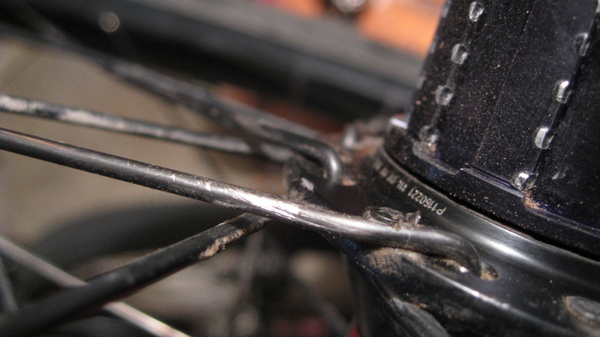
Once the lock ring is off, you can just slip the cassette off. The hub body for most wheels is aluminum and over time the cassette will dig into it, making it hard to remove (see picture below), but know that once the lockring is off there is nothing else holding it on, so just work the cassette off slowly if it sticks.
While the cassette is off inspect the spokes underneath. If you drop the chain behind the cassette a lot, you may see that (like in the picture) you have spoke damage. This is a really good time to take care of your spokes.
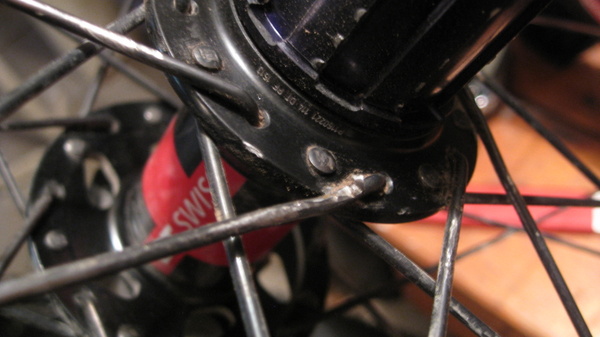
Here is a picture of the freehub, you can see how the cassette has dug into the body over time. This is fairly normal wear, but if yours looks a lot worse, take it to a shop for service.
Now put the new cassette on. There is a pattern for the cassette so turn it around on the top until it slides down. Alternately look at the pattern and match it up. There is one position where it will look like it works when you are turning it, but won't go all the way down, so don't force it.
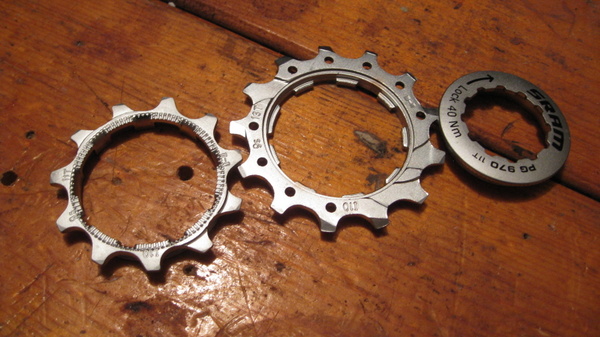
95% of the cassettes have a spider with 6-7 of the rings and the last 2-3 are loose. Once the main body of the cassette is on the wheel, put the last two rings on. They will only go on one way. The 8th ring (on a 9-speed) will have a spacer on the bottom and the ring on the top, so make sure you put it on with the spacer closer to the spider (it's the only way that it goes on, you'll know if you are doing it right. The final cog will have a "ratchet" on the top that meshes with the lock ring and holds it all in place when the lockring is installed.
Once the lockring is screwed in, use the lockring tool to tighten it up. Make sure it is tight, but don't over tighten it.
You do not need the chain whip to tighten the cassette, you only need that to take it off.